Author: admin
IBM Cloud – API Connect – Developer Portal Usage
I have already mentioned many details about IBM API Connect service in this post https://kenanhancer.com/2019/06/30/ibm-cloud-api-connect/ But, I tried to emphasize some details more clearly. There is a sequential structure in IBM API Connect. That is Cloud Foundry Organisations => Spaces => Catalogs => Products => APIs. In this case, if we want to find any API, we need to know Cloud Foundry Org, Space, Catalog, Product respectively so that we can find our API.
Cloud Foundry Orgs
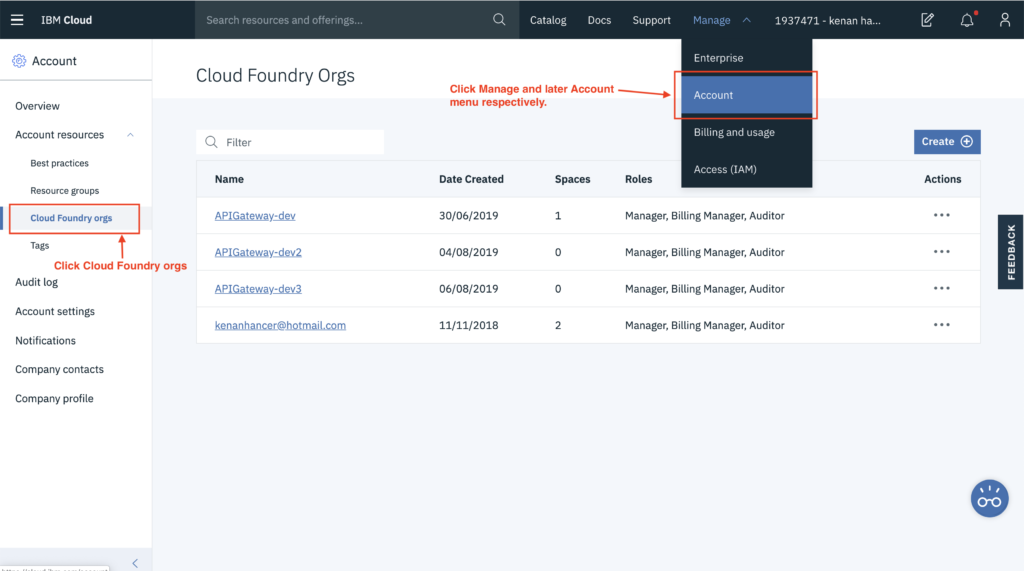
Cloud Foundry Orgs can be find under Account and Cloud Foundry orgs menu as shown below screenshot. In my case, I have 4 Cloud Foundry Orgs. As I said preceding, there is spaces under Organisations. So, there is 1 space in APIGateway-dev organisation and 2 spaces in kenanhancer@hotmail.com organisation. APIGateway-dev2 and APIGateway-dev3 don't have any spaces.
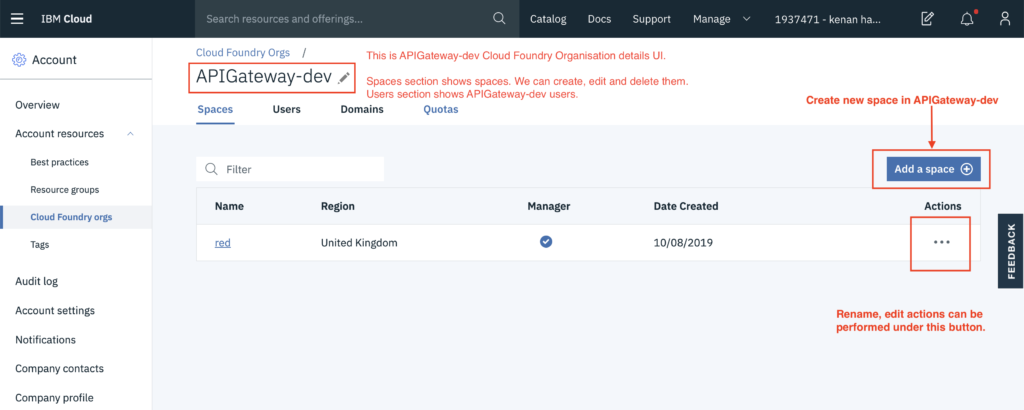
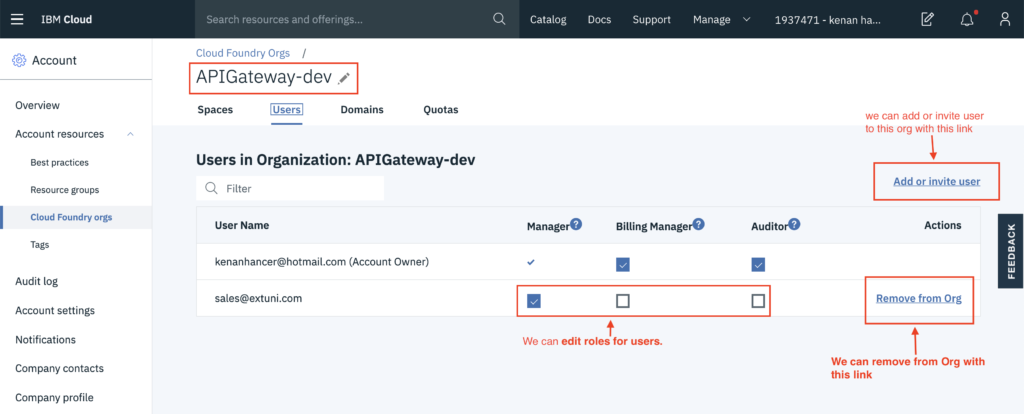
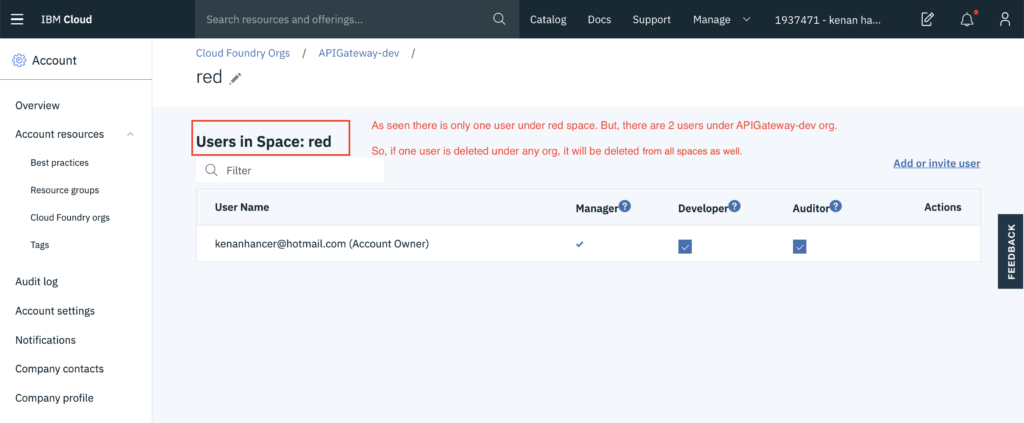
So, let's see APIGateway-dev org details in the following screenshot.
IBM Cloud – API Connect
Actually, I struggled very very much to understand how API Connect service works. Because, I couldn't find a good documentation in IBM official site. So, I hope that someone who needs to understand may benefit from this article. I think that writing too much about API Connect UI is not very helpful. That is to say, Pictures sometimes may say many things clearly. So, you will see many screenshots with simple descriptions. 😉
First view of IBM Cloud UI

Kubernetes single node cluster with Minikube and Vagrant
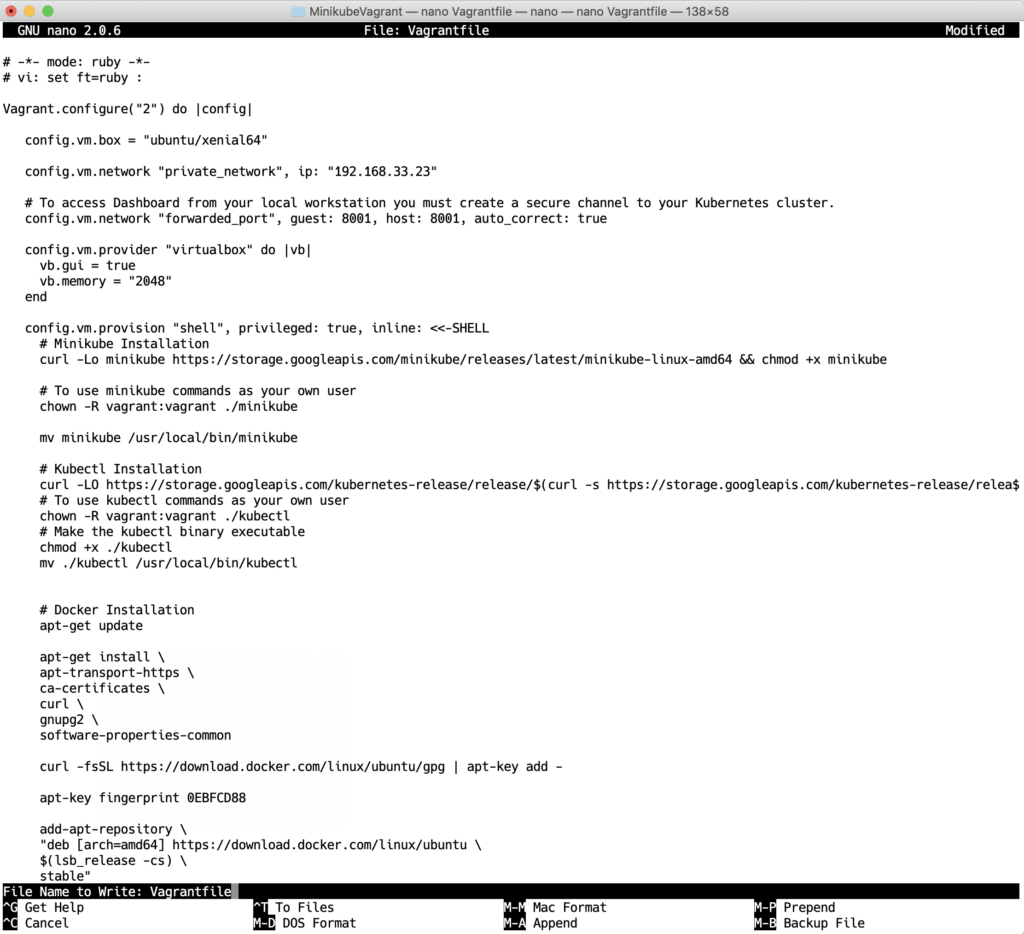
The following Vagrantfile code(syntax is Ruby) is creating single node Kubernetes cluster with Minikube.
Copy above code and follow the following screenshots. Run the following commands in Terminal.
mkdir MinikubeVagrant

cd MinikubeVagrant

nano Vagrantfile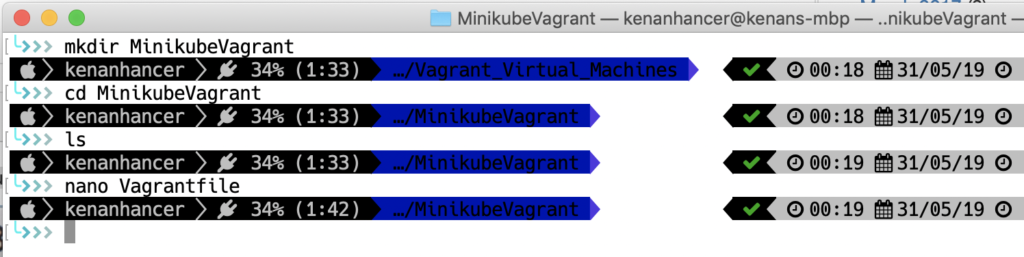
Paste the Vagrantfile content like below.
save Vagrantfile and run the following command to start virtual machine.
vagrant up
Creating Kubernetes Dashboard Proxy
After Vagrant is up, it means that Minikube is ready to use. So, connect with SSH to Vagrant machine and run the following code to start Kubernetes Dashboard Proxy.
kubectl proxy --address 0.0.0.0 --port=8001 --accept-hosts '.*'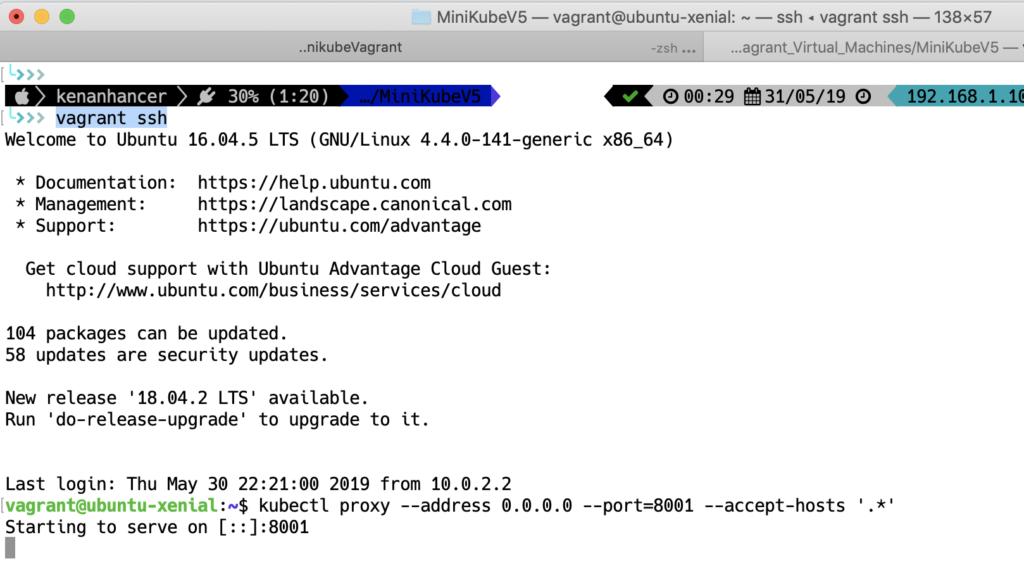
Connecting to Kubernetes Dashboard from Host machine
Click one of the following link to connect the Dashboard. Ta taaa 🙂
or

Rest of the details are already mentioned in this blog link Kubernetes multi node cluster with Vagrant (included Kubernetes Dashboards, Grafana, Prometheus)
read the Kubernetes Dashboard Access Control paragraph.
D3 Data-Driven Development Demo 1
I hava some simple examples in this demo. There will be more complex examples future posts about D3 as well. I hope it would be useful for entry level developers.
C# Usage of IComparable, IComparable < T >, IComparer, IComparer < T >, Comparison < T >
Node.js Babel 6.x different usage transpiling to ES5 and Debugging
There are different usages of babel tool. I put a sample package.json file. Notice that there are scripts block which has different usages.
You can reach github project from the following link.
https://github.com/kenanhancer/babel6-usage.git
You can reach Babel 7.x post from the following link.
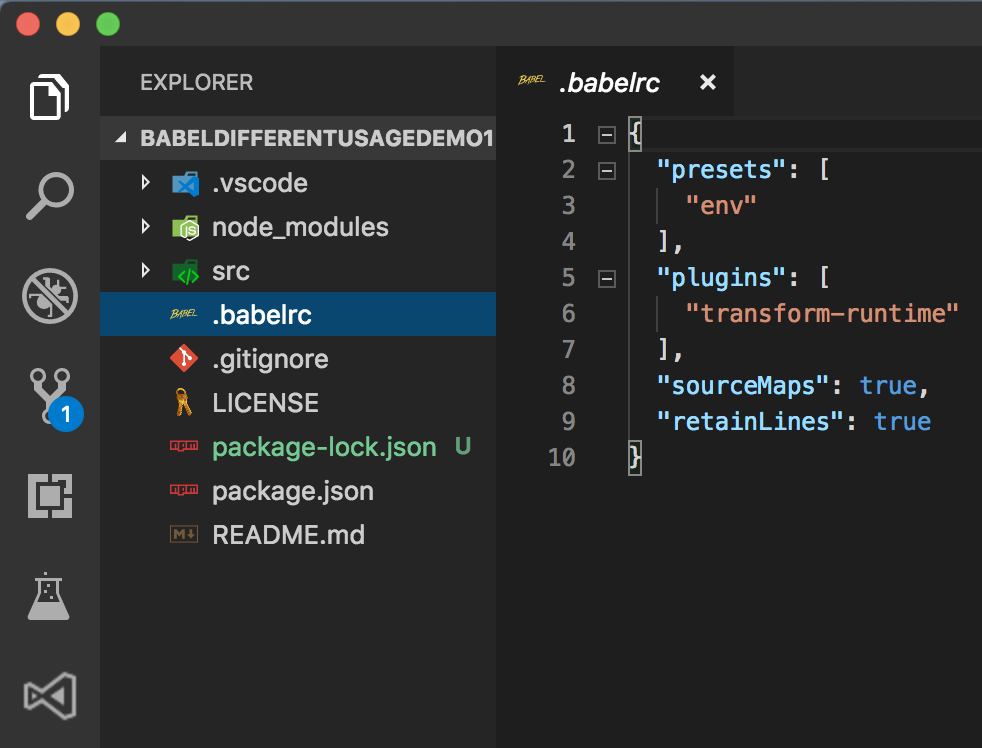
Creating Babel configuration file
.babelrc
{
  "presets": [
    "env"
  ],
  "plugins": [
    "transform-runtime"
  ],
  "sourceMaps": true,
  "retainLines": true
}
Running with Babel-node
//If you have installed babel-cli package globally, run below code.
babel-node --presets=env --plugins=transform-runtime src

or

//If you have .babelrc config file, run below code without specifying inline arguments.
babel-node src

or

//If you have installed babel-cli package locally, run below code.
./node_modules/.bin/babel-node --presets=env --plugins=transform-runtime srcLinux Bash: String Split
GitHub clone all repositories
After you join an organization, you will need to clone all git repositories in your machine probably. 🙂
So first follow this post https://kenanhancer.com/2018/11/08/github-connect-with-your-ssh-public-key/ to create a ssh key in your machine and put in github then you can clone all repositories for any user.
if you have any authentication issue, then create an access token from github, copy and paste instead of {acceess-token} in the following code.
curl -u {access-token}:x-oauth-basic -s https://api.github.com/users/kenanhancer/repos?per_page=2 | grep ssh_url | awk -F '"' '{print $4}' | xargs -n 1 -P 4 git cloneIn order to learn github API endpoint urls, use the following code.
curl https://api.github.com/To learn more details about official GitHub REST API v3, use the following link.
Node.js Module Export and Import with CommonJS and ES6
I hope that this post will help any developer who need to see variations of importing and exporting modules. To be honest, due to using different programming languages, I sometimes forget some features so this post helped me every time 🙂
This is an other online code editor. Same examples is in this example as well.