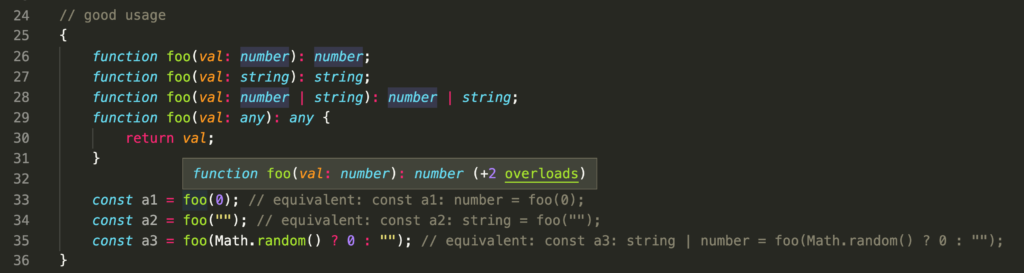
Function Overloading
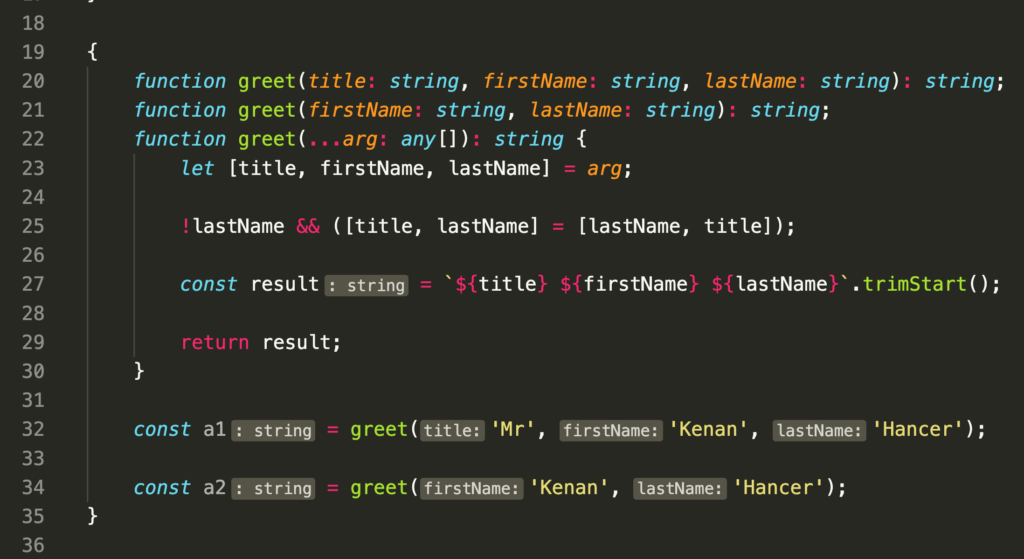
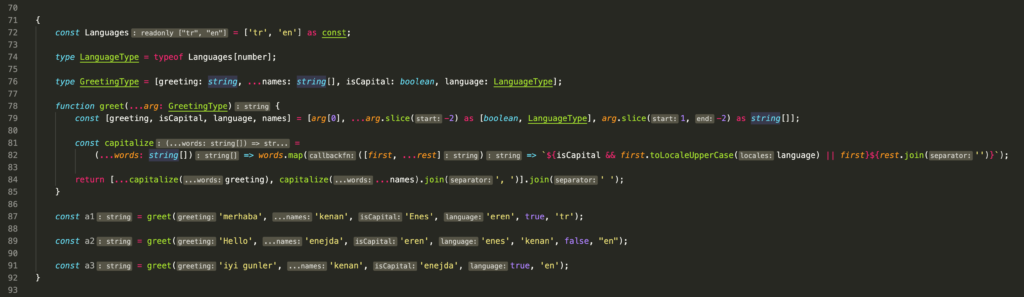
Function Overloading with Tuple Parameters
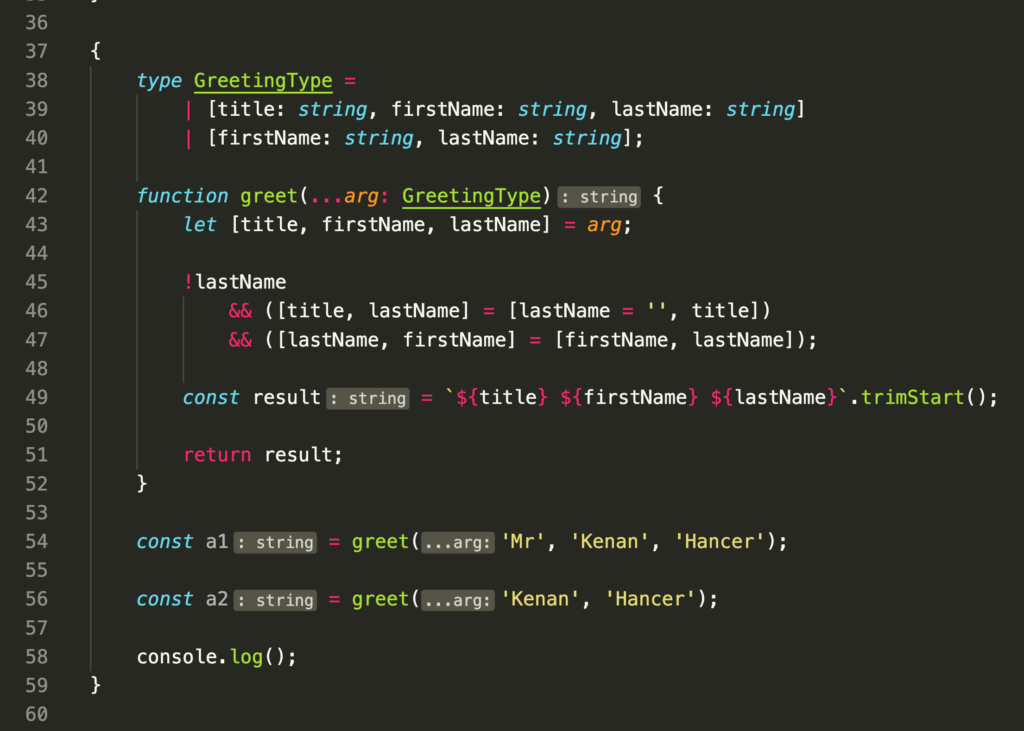
Simple Function with Rest Parameters

Function with Rest Parameters via Tuple


let isDone: boolean = false;let decimal: number = 6;
let hex: number = 0xf00d;
let binary: number = 0b1010;
let octal: number = 0o744;
let big: bigint = 100n;let color: string = "blue";
let fullName: string = 'Bob Bobbington';
let age: number = 37;
let sentence: string = `Hello, my name is ${fullName}.
I'll be ${age + 1} years old next month.`;let list: number[] = [1, 2, 3];
let list2: Array<number> = [1, 2, 3];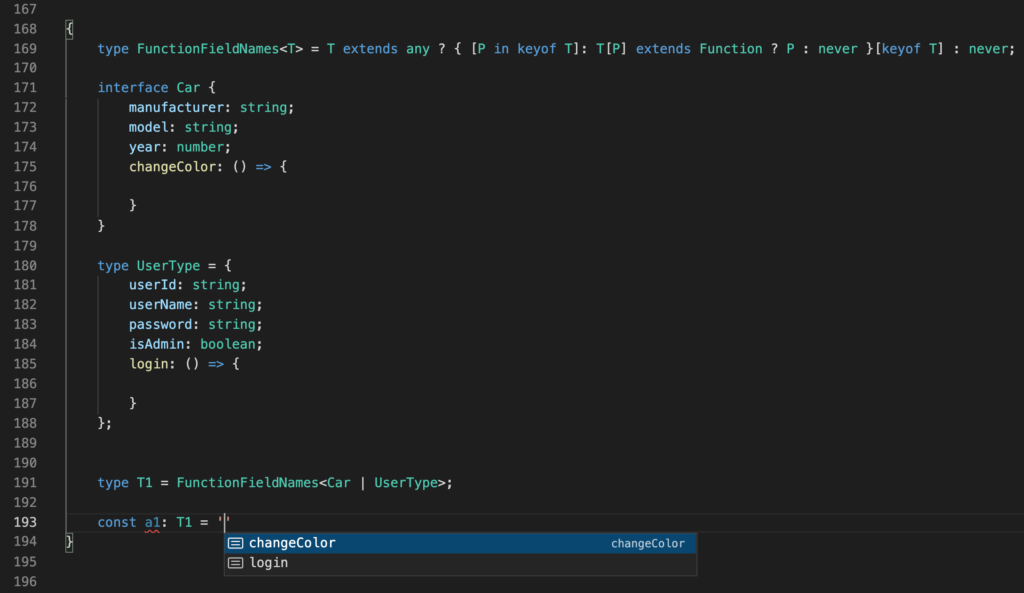
When you remove [keyof T] section in line 169, you will see a big difference.
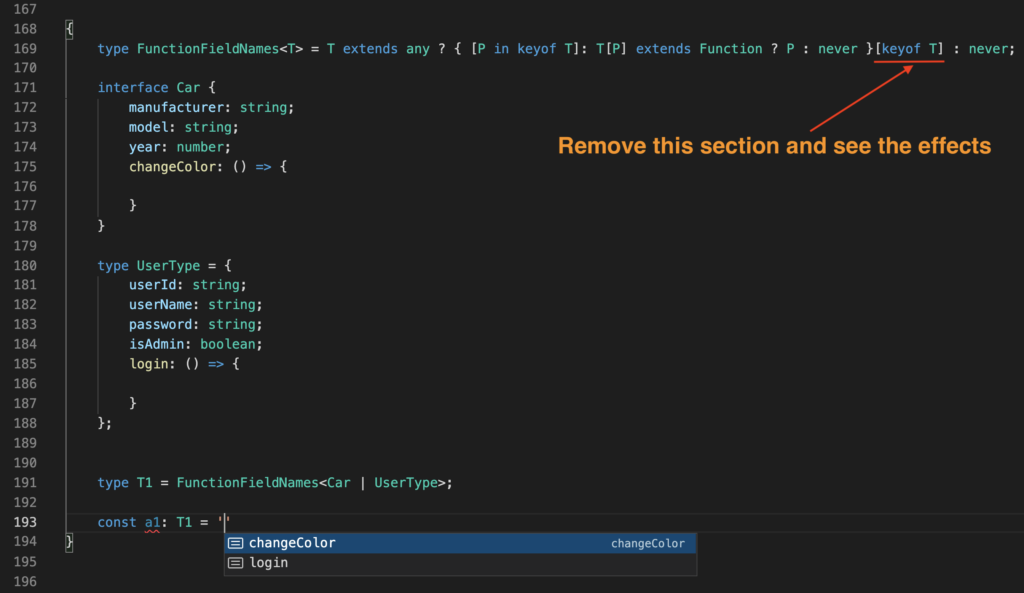
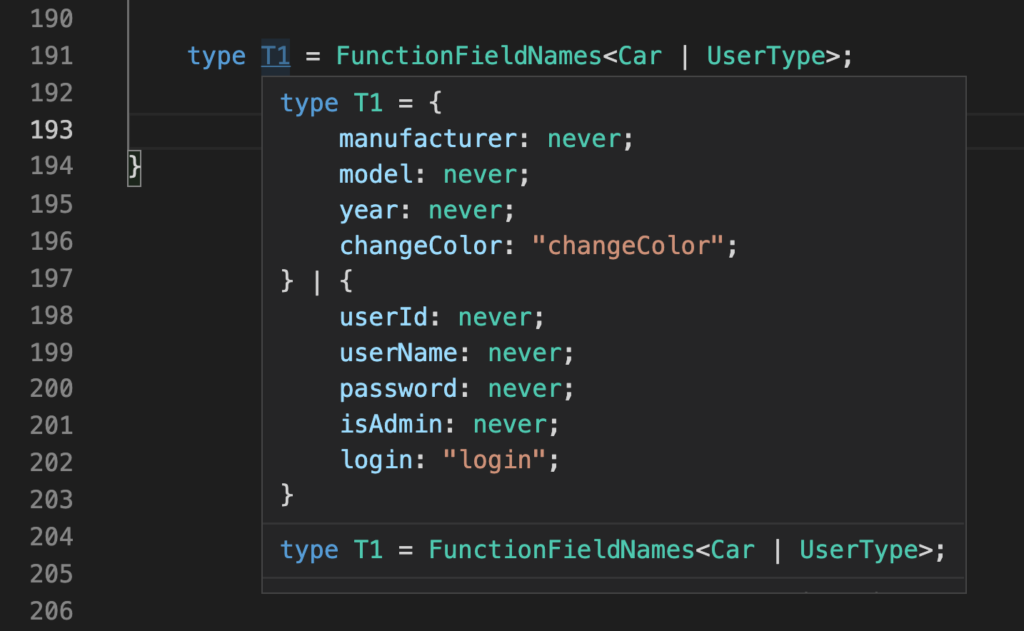
As you see in the following screenshot, it created an Union Object Type, but most of the field types are never. That's why, in order to list values of type, we need to have that deleted section.
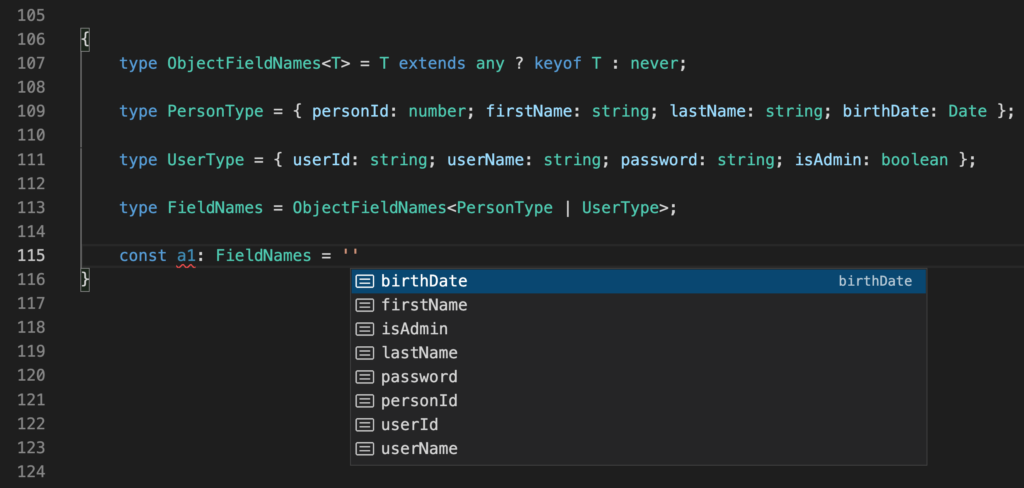
In order to support Union Type, I used Conditional Type.
type ObjectFieldNames<T> = T extends any ? keyof T : never;type ObjectFieldNames<T> = T extends { [P in infer A]: any } ? A : never;type ObjectFieldNames<T> = T extends Record<infer K, any> ? K : never;When conditional types act on a generic type, they become distributive when given a union type.
So, in order to support Union Type, use Conditional Type because it works as loop.
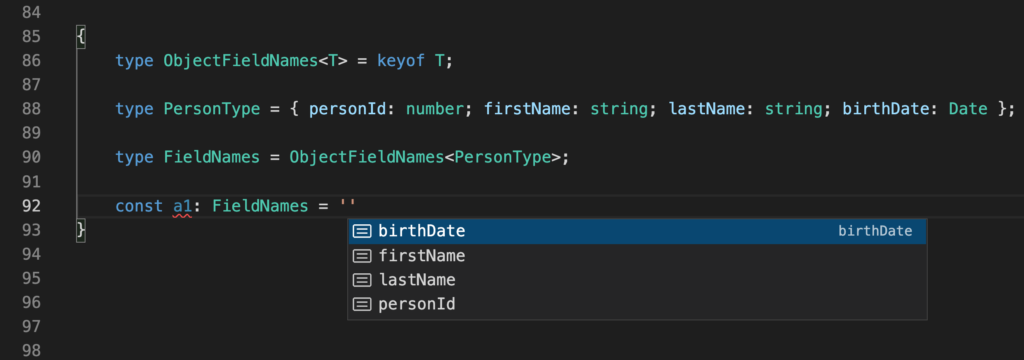
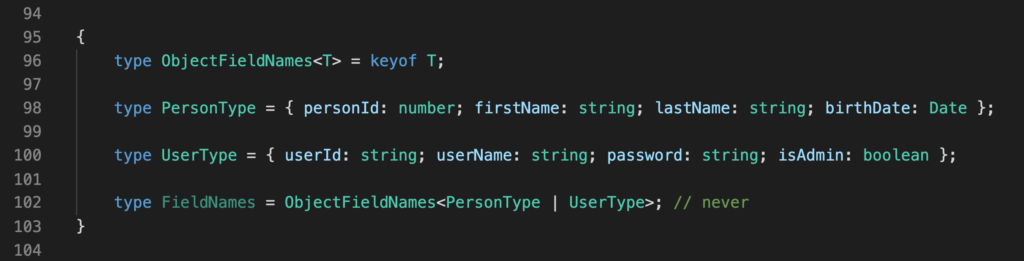
Notice that conditional type is not use in line 96 so ObjectFieldNames function couldn't retrieve field names in line 102.
You can think Union type as array, so conditional type will iterate for each type in Union.
For example, notice that PersonType | UserType is used as Union Type in line 113, and field names of both types are listed in Popup window as shown in below screenshot.
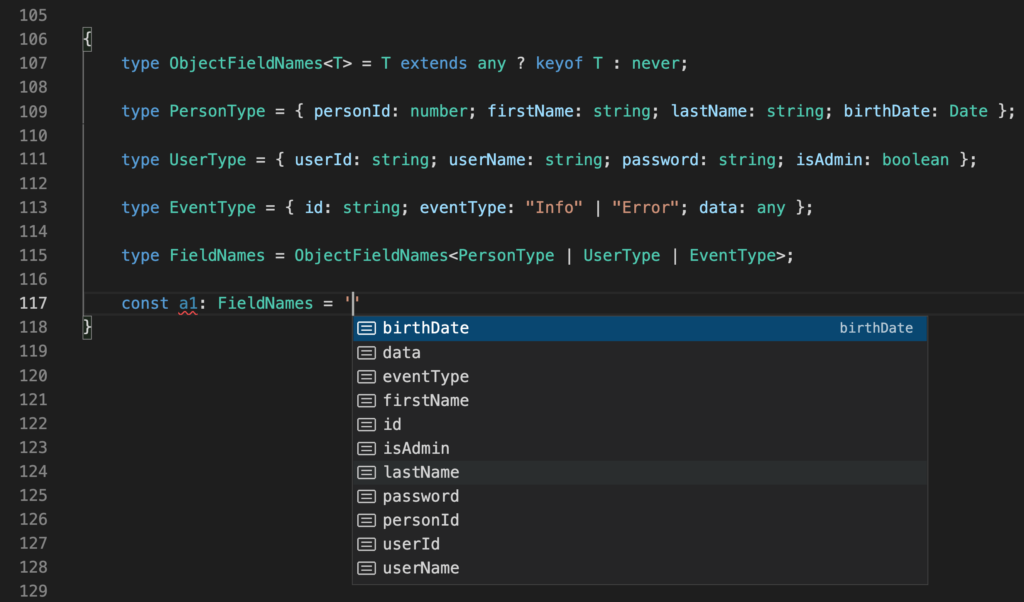
PersonType | UserType | EventType is used as Union Type in line 115, so Popup window showed more fields in the following screenshot.
for example PersonType | UserType | EventType, then ObjectFieldNames<T> is keyof PersonType | keyof UserType | keyof EventType
I want to share a small part of wikipedia description firstly then will continue with example codes.

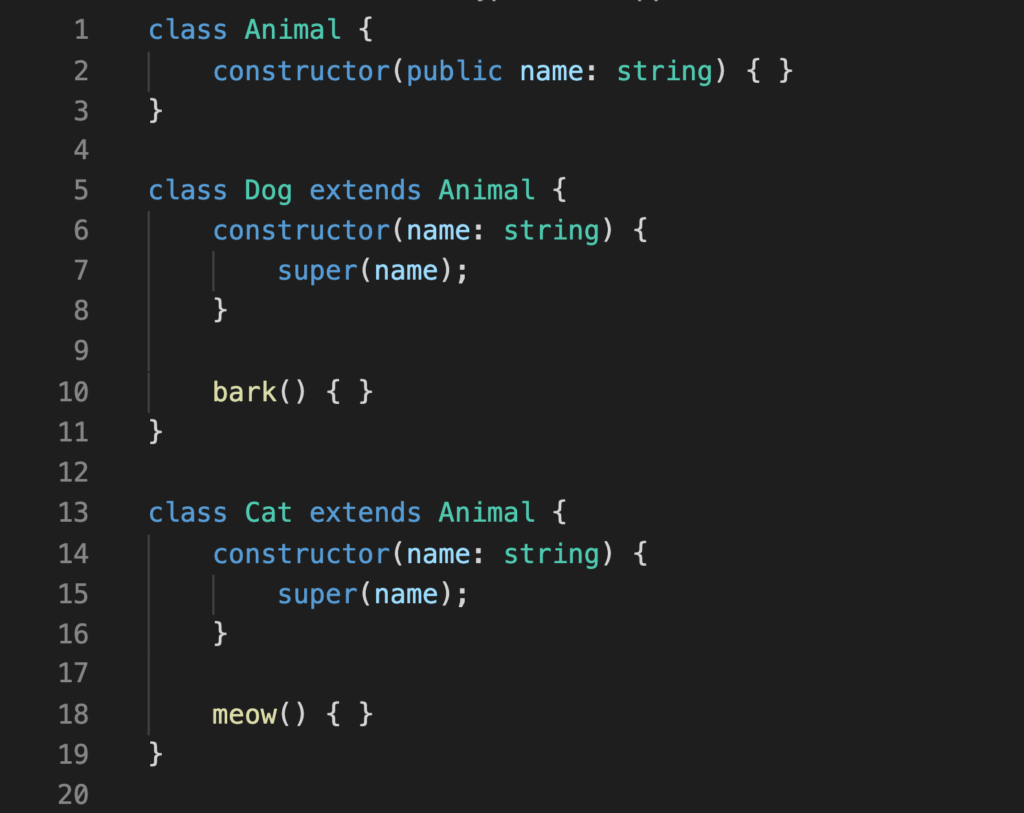
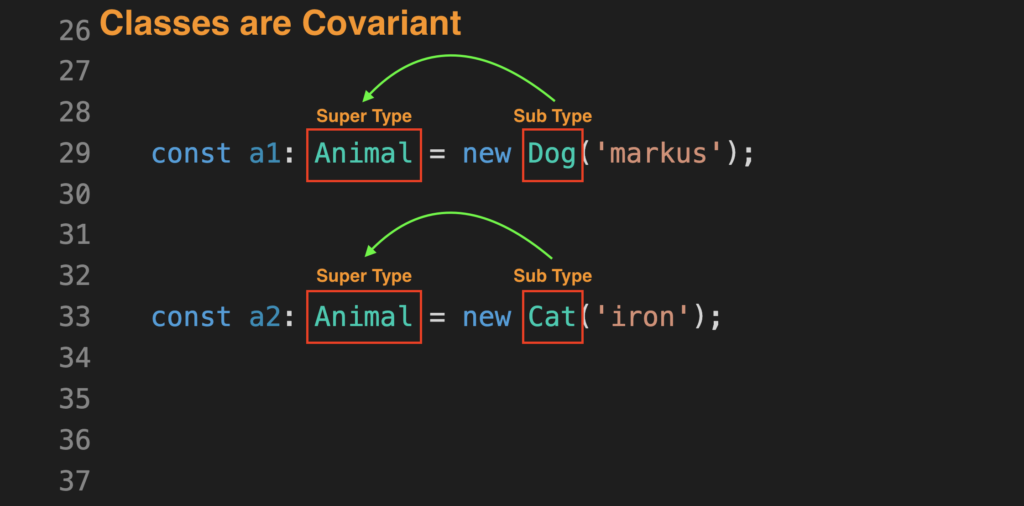
Assume that we work with below types.
Animal is Supertype.
Dog and Cat are Subtype.
Covariance means that Subtypes can be assigned to Supertypes. This is also known as Polymorphism or Subtyping. So Covariance = Polymorphism = Subtyping
In other words, Dog(Subtype) can be assigned to Animal(Subtype) or Dog(Subtype)
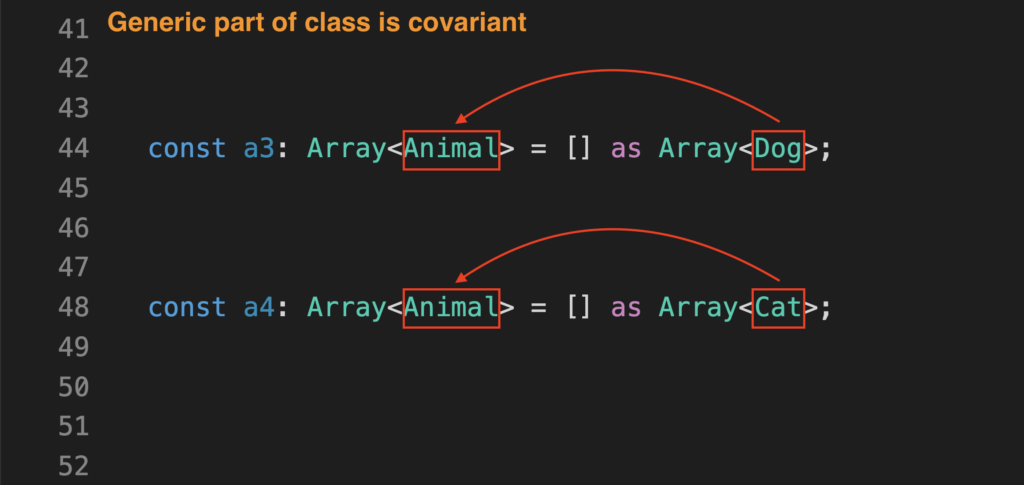
Generic types are also covariant.

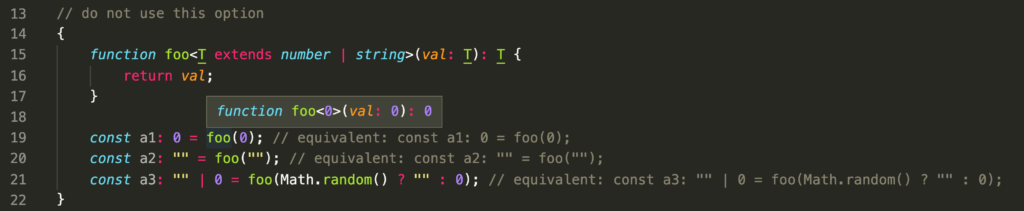
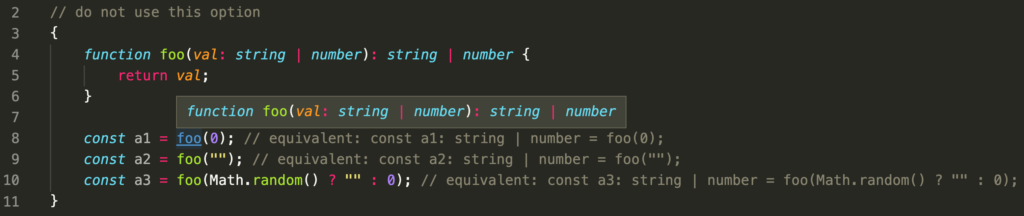
Narrowing return type of function is a little bit strange in TypeScript. So I share use cases below from bad to good 🙂
Notice that even I call foo(0) in line 8, when I hover mouse on foo in line 8, popup shows val parameter type as string | number union type. But it should show as number. So it is not narrowing parameter and return type of function.
This usage narrows parameter and return type of function as literal type. But we need to narrow to type of parameter not value of parameter as literal type. Popup shows generic parameter type as 0, that's why, parameter and return type becomes 0.